Showing posts with label windows. Show all posts

4 September 2012

How to determine whether a computer is running a 32-bit version or 64-bit version of the Windows operating system


Windows Vista or Windows 7
If you have Windows Vista or Windows 7, there are two methods to determine whether you are running a 32-bit or a 64-bit version. If one does not work, try the other.

Method 1: View System window in Control Panel
     1.  Click Start, type system in the Start Search box, and then click system in the Programs list.
     2.  The operating system is displayed as follows:
            1.  For a 64-bit version operating system: 64-bit Operating System appears for the System type underSystem.
            2.   For a 32-bit version operating system: 32-bit Operating System appears for the System type underSystem.

Method 2: View System Information window
     1.    Click Start, type system in the Start Search box, and then click System Information in the Programs list.
      2.    When System Summary is selected in the navigation pane, the operating system is displayed as follows:
            1.  For a 64-bit version operating system: x64-based PC appears for the System type under Item.
            2.  For a 32-bit version operating system: x86-based PC appears for the System type under Item.

Windows XP
If you have Windows XP, there are two methods to determine whether you are running a 32-bit or a 64-bit version. If one does not work, try the other.

Method 1: View System Properties in Control Panel
     1.    Click Start, and then click Run.
     2.    Type sysdm.cpl, and then click OK.
     3.    Click the General tab. The operating system is displayed as follows:
            1.  For a 64-bit version operating system: Windows XP Professional x64 Edition Version < Year> appears under System.
            2.   For a 32-bit version operating system: Windows XP Professional Version appears under System.
Note is a placeholder for a year.

Method 2: View System Information window
    1.    Click Start, and then click Run.
    2.     Type winmsd.exe, and then click OK.
    3.     When System Summary is selected in the navigation pane, locate Processor under Item in the details pane. Note the value.
If the value that corresponds to Processor starts with x86, the computer is running a 32-bit version of Windows.
If the value that corresponds to Processor starts with ia64 or AMD64, the computer is running a 64-bit version of Windows.
Windows Server 2003
If you cannot determine the operating system bit count with these methods, go to the "Next Steps" section. Windows Server 2003. If you have Windows Server 2003, there are two methods to determine whether you are running a 32-bit or a 64-bit version. If one does not work, try the other.

Method 1: View System Properties in Control Panel
    1.    Click Start, and then click Run.
    2.    Type sysdm.cpl, and then click OK.
    3.    Click the General tab. The operating system is displayed as follows:
          1.    For a 64-bit version operating system: Windows Server 2003 Enterprise x64 Edition appears underSystem.
          2      For a 32-bit version operating system: Windows Server 2003 Enterprise Edition appears under System.

Method 2: View System Information window

   1.   Click Start, and then click Run
   2.   Type winmsd.exe, and then click OK.
   3.    When System Summary is selected in the navigation pane, locate Processor under Item in the details pane. Note the value.
          1.    If the value that corresponds to Processor starts with x86, the computer is running a 32-bit version of Windows.
         2.   If the value that corresponds to Processor starts with EM64T or ia64, the computer is running a 64-bit version of Windows.

21 August 2012

What are the best features in Windows 7


Windows 7 is a “user-centric” version of the Windows operating system that is faster, more reliable, and more secure than previous versions of Windows. Windows 7 introduced tons of great new features and improvements. Here are some of the cool changes for Windows 7:

Performance Improvements

Windows 7 sleeps, resumes, and reconnects to wireless networks faster so you can start using your PC faster. Windows 7 improvements made PC boot time much faster for PC users all over the world . We think everyone should be able to use their PCs without having to wait. That’s why we  helps you to reduce your boot time by viewing, removing, or delaying background apps that run during boot.

      Improvements to Windows Tools

Windows Explorer was improved for Windows 7 to help you search, find, and access your files and programs faster and easier.
Windows 7 added features to the Start menu, such as Jump Lists, to help you quickly access the programs, files, and options that you use most and have used recently.
The taskbar was redesigned and improved for Windows 7, allowing you to see the applications that are running, see and interact with thumbnail images of windows for each application, access Jump Lists of common tasks, and pin applications to the taskbar for convenient access anytime.
Updates to Windows SoftwareHere at Soluto we want to help you access your files faster and view important PC information easily, so we help you remotely defrag PC hard drives and view important information about the PCs you manage from anywhere.
Microsoft introduced Internet Explorer 8 with the Windows 7 release. Now with Internet Explorer 9 available on Windows 7, users can browse the internet with streamlined navigation tools, the One Box multi-function Address Bar, and SmartScreen Filter to protect users from malicious sites and software.
Soluto makes it easy to stay up to date and get new apps by allowing you to remotely and silently update and install apps for your own PC and the PCs you support. Best of all, Soluto updates and installs software in the background so you can keep using your computer without any interruptions.

17 August 2012

Why Won't Windows Delete a File?


Has Windows ever prevented you from deleting a file? This is one of those mysteries that can make you throw up your hands and cry, "Really, Windows? Really?" After all, deleting a file isn't brain surgery; it's computing at its most basic level. So why is your system balking at such a simple task?
It's for your own protection--most of the time, anyway. If Windows won't delete a file or folder, that's usually because some application or operating system process is accessing it. If you were to delete the item while it's "in use" (even if you're not using it directly), an app or even Windows itself could crash.
Nine times out of ten, the best way to deal with a file or folder that won't go willingly is to reboot your PC. Then, before you run any programs, try deleting that file again. It should go quietly.

16 August 2012

How to Specify a Location for Saving Downloads


Have you downloaded files yet been unable to find them afterward? The Mystery of the Missing Downloads usually leads you back to your Web browser. Internet Explorer (version 8, anyway) is kind enough to ask where you want to save every file before downloading it. Chrome and Firefox, however, make the choice for you by default, which leaves a lot of users scratching their heads after a download is complete.
It's easy to make either of those browsers a little more cooperative, though.

Step by Step: Firefox

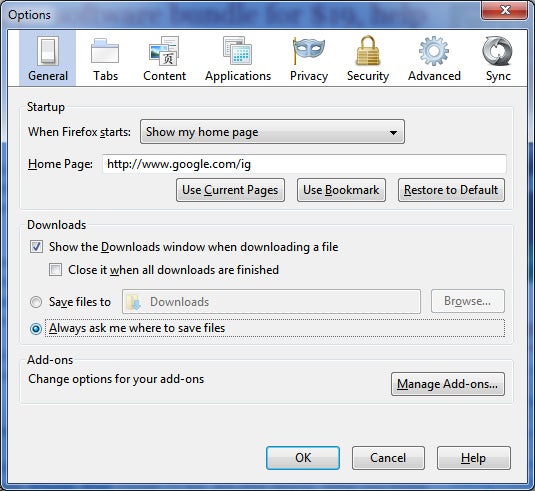
How to specify a location for saving downloadsStep 1. In Firefox, click Tools, Options, and then select the Generaltab. Note the Downloads section, where you have the option of choosing where all downloads should go by default. (Some people prefer the Desktop over the default Downloads folder.)
Step 2. Enable Always ask me where to save files, and then click OK. Now, every time you download something, Firefox will let you choose where to save it.

Step by Step: Chrome

Step 1. In Chrome, click the little wrench at top right, then Options, and then the Under the Hood tab.
Step 2. Scroll down to Downloads and check the box marked Ask where to save each file before downloading. (As with Firefox, you can change the default folder if you wish.)
One other clue to consider: If you don't pay attention to the names of the files you're downloading, you may not know how to find the right item, even if you succeed in navigating to the right folder. The solution: Sort all of the files by date, from newest to oldest. The top file is your most recent download

How to Install Windows 7 Without the Disc


How to Install Windows 7 Without the DiscMany computers ship without Windows 7 installation discs. Instead they come with "recovery" discs and/or partitions that claim to restore your PC to its "factory fresh" state, but include a ton of bloatware (free trials, media players, useless utilities, and the like) along with Windows. Removing each piece of bloat is time-consuming, and just not the same as truly starting fresh.
In this article, you'll learn how to make your own Windows 7 installation disc (or USB flash drive) and use the valid product key you already have to perform a fresh reinstallation. The following method is effective and legal, and doesn’t require a lot of technical expertise. (If you do need help with bloatware, however, read "What to Do With a New PC.")
However, we don't recommend that you delete your recovery partition or throw away your existing recovery discs. Although many people have had success with the following procedure, others have not. Some users have not been able to activate their copy of Windows even after entering a valid product key, while others own PCs that require software not included in a Windows 7 ISO. You have no way to know whether this procedure will work for you until you try, and you need a backup plan in case it doesn’t.
Also, save your files and drivers to external media before you start. Reinstalling Windows wipes out all personal data and causes a loss of functionality in devices for which Windows lacks an adequate built-in driver. Plan on loading the latest device drivers from media you create before reinstalling Windows.

Reinstalling Windows 7, Step by Step

1. Find your Windows 7 product key: Typically this 25-character alphanumeric string is printed on a sticker affixed to your PC or on documentation included with your PC. Alternatively, you can use a keyfinder program such as Magical Jelly Bean Keyfinder to pull your product key from the Registry. You need your product key to reinstall Windows.
Magical Jelly Bean Keyfinder helps you round up your serial numbers.Magical Jelly Bean Keyfinder helps you round up your serial numbers.
2. Download the ISO file for the version of Windows 7 you own:
The above links point to Digital River, a licensed distributor of Microsoft software. These downloads are each over 3GB, and your product key will work only with your edition of Windows, so make sure to select the right one.
3. Download the Windows 7 USB/DVD download tool. This utility lets you copy your Windows 7 ISO file to a DVD or USB flash drive. Whether you choose DVD or USB makes no difference; just confirm that your PC can boot to the media type you select.
4. Boot your computer using the Windows 7 DVD or USB flash drive. Follow the prompts to prepare the destination hard drive and install Windows.

What to Do With a New PC


What to Do With a New PCEveryone has their own I-just-bought-a-new-PC ritual. Some folks start by loading their pristine PC down with all their utilities and apps. Others immediately jump into the new games their old machine couldn't handle. A few others install Linux.
That’s all well and good--but before doing any of those things, you should take a few important steps. Prior to diving headfirst into your new laptop or desktop, read our favorite new-PC tips and tricks, all of which are designed to keep your system feeling brand-new for as long as possible.

Step 1: Update Windows

What to Do With a New PC: Update WindowsAfter you're done pulling the plastic off your new PC and plugging it in, the first thing you should do is grab all the Windows updates your new machine can handle. Of course, you'll need a network connection for that; just link your PC to your modem or router by inserting an ethernet cable, or if your PC supports Wi-Fi and you have a Wi-Fi network, open the Control Panel, go to Network and Sharing Center, and clickConnect to a network.
Once you’re connected to the Internet, go to the Control Panel, choose Windows Update, and clickCheck for updates to make sure Windows Update pulls in as many updates as possible.
Depending on how long your PC was sitting on a store shelf without an Internet connection, this process could take anywhere from a few minutes to more than an hour. Each update may require a reboot, and some updates prompt even more: You'll probably have to grab updates, reboot, and check Windows Update again for updates to those updates you just installed.
Unfortunately, we can't do much to help you speed up this step. However, you may want to read our tutorial about slipstreaming Windows 7 updates on a USB drive, which eliminates the need to download updates over and over. Placing the latest updates on a USB drive lets you install the latest Windows 7 updates as you run the Windows 7 installation disc. It’s especially useful if you're the administrator for a few PCs on your home or office network, as it cuts down the time needed to download and install updates on each machine.

Step 2: Uninstall the Crapware

SlimComputer uses a crowd-sourced database to recommend which apps you should install and which apps you should keep--but the recommendations aren't always useful.SlimComputer uses a crowd-sourced database to recommend which apps you should install and which apps you should keep--but the recommendations aren't always useful.Unless you built your PC yourself, it likely came with a whole bunch of preinstalled apps and utilities. Many of these are undoubtedly well-intentioned inclusions--and some might even be useful--but you don't have to hang on to your 30-day Norton AntiVirus trial if you know that you're just going to use Microsoft Security Essentials instead.
If you know exactly what to keep and what to get rid of, a deep uninstaller utility such as Revo Uninstaller is all you need. The free, basic version scans your system to ensure that it eliminates applications that Windows' built-in uninstaller sometimes misses.
However, determining what's crapware and what's worthwhile isn't always easy. PC Decrapifierdoes a good job of identifying a lot of the common crapware culprits--toolbars, trial-application installers, shortcuts for setting up old dial-up services, and so on. You get to review the list of recommended items to uninstall before you pull the trigger, so you don't need to worry about accidentally losing something you want to keep.
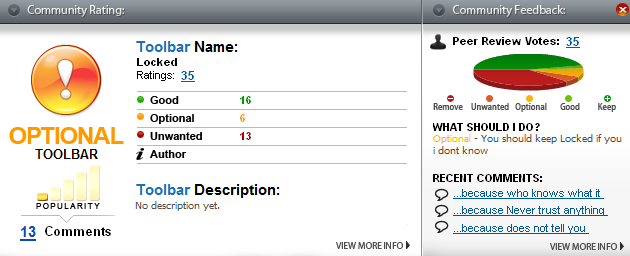
Alternatively, you could give SlimComputer a shot. Like PC Decrapifier, SlimComputer aims to take out the junk, but it uses feedback from other SlimComputer users to make recommendations and provide brief notes as to why a program may or may not be useful. As always, we’d balance out a lot of the user-supplied comments with a healthy dose of common sense, but they are a helpful point of reference for any applications you're on the fence about.

Step 3: Update the Drivers

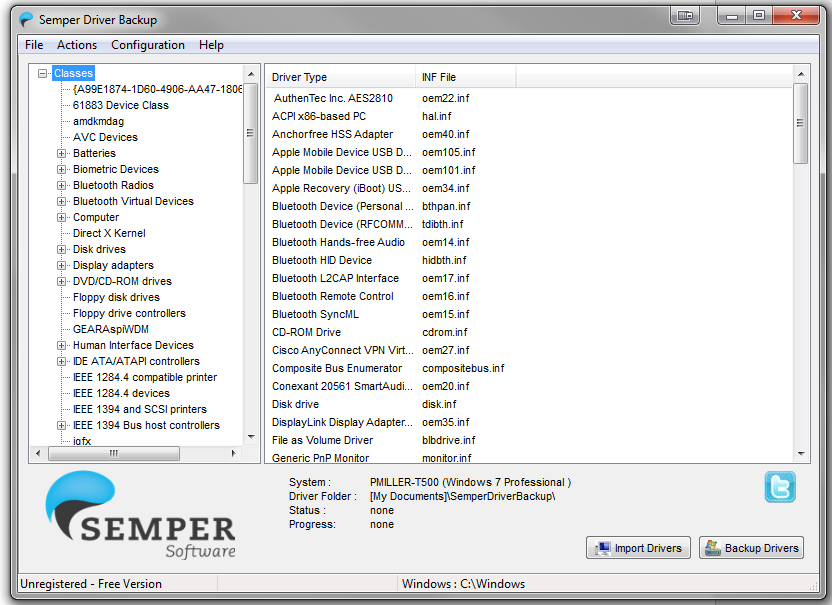
Semper Driver Backup can create a library of your drivers and back it up.Semper Driver Backup can create a library of your drivers and back it up.The drivers are what turn the collection of parts in your PC from a generic Windows-running box into a processing powerhouse. Your ideal driver setup, though, depends in part on your PC's configuration--and on your tolerance for risk.
Generally speaking, you want to have the newest drivers available for all your gear. For example, making sure your graphics card's drivers are up-to-date will usually fix bugs and enhance performance with each new revision, and you might not be able to perform basic functions such as networking or audio input/output without your motherboard's full set of current drivers. If you're still having problems getting certain devices to work, updating the BIOS might be in order.
If you stick around the PC scene long enough, however, you’ll inevitably come across a driver update that breaks something that used to work perfectly. That's why some people prefer to stay with whatever driver version works for them--and leave it at that until something doesn't work. Short of clinging to an older, working driver, you can fix many driver-related problems by rolling back to a previous driver version, or you can uninstall the updated drivers and reinstall (from scratch) a version that worked fine.
If you're on a new, store-bought Windows 7 PC and all of the component drivers are preinstalled, you're probably better off with the existing drivers (though you may want to check for BIOS and graphics-card driver updates for the performance benefits anyway). Also, you don't necessarily need to worry about finding drivers for everything on your PC: Windows has generic drivers available for USB drives, keyboards, mice, webcams, and so on.
On the other hand, if you're breaking in a PC that you made yourself, we recommend updating everything to the latest stable drivers available. If things aren't working seamlessly after that, find out whether the component manufacturer offers a beta driver that works better.
Once all your drivers are in working order, you'll probably never want to deal with this stuff ever again, so grab a driver-backup tool such as Semper Driver Backup or Double Driver. These tools make a quick copy of all your current drivers, so you can easily restore the drivers if (or when) something goes wrong.

Step 4: Install Everything at Once

Ninite lets you batch-install and update dozens of common useful Windows apps.Ninite lets you batch-install and update dozens of common useful Windows apps.By this point you're probably itching to install the applications and utilities you've grown accustomed to using on your previous machines. The hard part is remembering every single application you use--probably not difficult for those you work in on a daily basis, but a bit harder for the ones you touch only every week or month or so--and spending the time to seek out and download each and every one of them.
When it comes to tools that can help with this monumental task, we can't sing Ninite's praises enough. Head to that site, and you can view a huge catalog of common free apps--Web browsers, antivirus utilities, file-sharing and media-playback programs, and so on--and get them all bundled in one installer file. You just choose the software you want, download the custom installer, and download everything in one fell swoop. Ninite even selects the 32-bit or 64-bit version as appropriate for your PC, and it skips all the adware and toolbars that, ordinarily, you might install by accident while clicking Next over and over.
One more tip: Resist the urge to delete Ninite's installer once it's done working its magic. If you run it after you've already installed all of your apps, it will check for any updates and automatically download and install the ones you need.

Step 5: Disaster-Proof Your PC

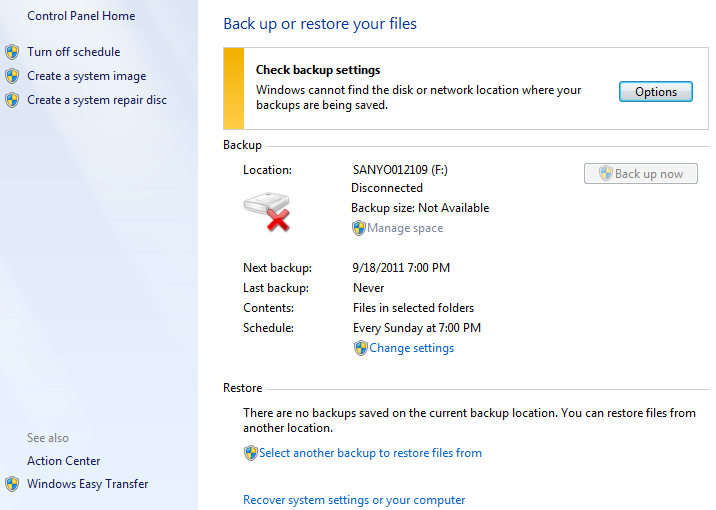
Windows Backup is a free, basic backup tool built into Windows 7.Windows Backup is a free, basic backup tool built into Windows 7.Congratulations! By now, your PC should be primed for action, just the way you like it. Get out of your seat and stretch for a minute. Then sit back down--you still need to do two things before the system is fully prepared for everyday use. You don't want to have to repeat this whole process if something goes wrong with your hardware or Windows installation, so this step will create a sort of “reset button” that brings your PC back to its ultimate state.
Take a moment to preserve your machine's pristine, work-ready existence with Macrium Reflect Free, which creates an image backup of your hard drive that you save to a backup drive. If anything terrible happens during your computing adventures, you can just restore the system from this image backup.
You should probably also set up an automated backup system if you haven't already. If you pay $40 for the Pro version of Macrium Reflect, it adds automatic incremental backups to that same image file; you won’t have to create a new one each time.
If you'd rather save the cash, you can use Windows 7's built-in Backup and Restore features instead. To do so, open the Control Panel, click Backup and Restore, and adjust the basic backup settings (location, frequency, backup directories, and the like). For more tips on disaster-proofing your PC, read Rick Broida's "Prepare Your PC for Future Data Disasters."
If you've read this far and followed all the steps, your new PC is now plenty prepared for the future. It’s time to take your new machine for a spin!
I Can't Open Files of a Particular Type


Wirewire couldn't open Excel spreadsheets by double-clicking them, and turned to the Answer Line forum for help. My answer isn't specific to Excel.
Windows uses a file's extension (.xls, .docx, .mp3, and so on) to know what program should open it. But if the extension isn't associated with a particular application, Windows has no idea what to do with it.
Here's how to make that association in Windows 7, XP, and Vista:
Right-click a file of the type you want to open. If you see an Open with option on the pop-up menu, select that. Otherwise, select Open.
In the resulting dialog box, click the option Select a program from a list of installed programs (in XP,Select the program from a list)and click OK.
Near the bottom of the next dialog box, make sure that the option Always use the selected program to open this kind of file is checked.
Now turn your eyes to the main body of the dialog box. If you see the desired program, select it and click OK.
If you don't see the program, click Browse. In the resulting Open With dialog box, search through your hard drive's folders to find the program's .exe file. It will probably be in a subfolder of C:\Program Files or--if you have an x64 version of Windows--C:\Program Files (x86).
Still can't find it? Click Start, All Programs. Find the program on the Start menu, right-click it and select Properties. Click the Shortcut tab. Copy and paste the contents of the Target field into the Open With dialog box's File Name field.
After you click OK, Windows will know how to open the file.

12 August 2012

How to Create Your Own Customized Run Commands

The Run command on Microsoft Windows operating system allows you to directly open an application or document with just a single command instead of navigating to it’slocation and double-clicking the executable icon. However, it only works for some of the inbuiltWindows programs such as Command prompt (cmd), Calculator (calc) etc. So, have you ever wondered how to create your own customized Run commands accessing your favorite programs, files and folders? Well, read on to find out the answer.
Creating the Customized Run Command
 

Let me take up an example of how to create a customized run command for opening the Internet explorer. Once you create this command, you should be able to open the Internet explorer just by typing “ie” (without quotes) in the Run dialog box. Here is how you can do that.

1. Right click on your Desktop and select New -> Shortcut.

2. You will see a “Create Shortcut” Dialog box as shown below


3. Click on “Browse”, navigate to: Program Files -> Internet Explorer from your Root drive(usually C:\) and select “iexplore” as shown in the above figure and click on “OK”.

4. Now click on “Next” and type any name for your shortcut. You can choose any name as per your choice; this will be your customized “Run command”. In this case I name my shortcut as “ie”. Click on “Finish”.

5. You will see a shortcut named “ie” on your desktop. All you need to do is just copy this shortcut and paste it in your Windows folder (usually “C:/Windows”). Once you have copied the shortcut onto your Windows folder, you can delete the one on your Desktop.

6. That’s it! From now on, just open the Run dialog box, type ie and hit Enter to open the Internet Explorer.

In this way you can create customized Run commands for any program of your choice. Say “ff” for Firefox, “ym” for Yahoo messenger, “wmp” for Windows media player and so on.

To do this, when you click on “Browse” in the Step-3, just select the target program’s main executable (.exe) file which will usually be located in the C:\Program Files folder. Give a simple and short name for this shortcut as per your choice and copy the shortcut file onto the Windowsfolder as usual. Now just type this short name in the Run dialog box to open the program.

I hope you like this post! Pass your comments.

7 August 2012

How to install a DLL file in Windows


How to install a DLL file in Windows?
  1. Uncompress the DLL downloaded file from DLL-Downloads.com to your system32 folder within the Windows folder.  [c:\WINDOWS\system32]
  2. Click on the Start button, then click the Run... option
  3. In the "Open" line, type the following (without quotes) "regsvr32 filename.dll" (replace filename.dll with the actual filename of the file you downloaded), then click the "OK" button.
  4. How to Install a DLL file?
  5. If the installation was successful, you should see a message saying that your file was successfully installed/uninstalled.

    How to install a DLL file? - Use regsvr32 installation command

Top 9 Simple Things Every Computer User Should Know How to Do

10.     We all know we should back up our computers, but it’s always one of those things that you’ll set up “one day”.  Setting up a ba...