Showing posts with label Window Tricks. Show all posts

6 June 2019

Top 9 Simple Things Every Computer User Should Know How to Do


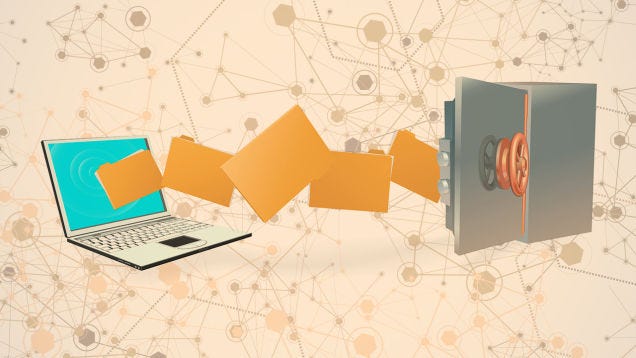
10.    We all know we should back up our computers, but it’s always one of those things that you’ll set up “one day”. 

Setting up a backup only takes minutes, though, so you can do it right now and forget about it until you need it—and when you do need it, you’ll be glad you set it up. If you’re just backing up to an external drive, you can just use the simple tools built in to your computer, like Windows Backup or Apple’s Time Machine. However, that’ll only keep you safe if your computer fails. If you lose your home in a fire, get all your gear stolen, or experience any other kind of disaster (God forbid), you’ll have lost all those important documents, family photos, and other files forever. So, we recommend using a service like CrashPlan to back up your computer online. That way, it can back up no matter where you are, and that data will be safe no matter what happens to your hardware.


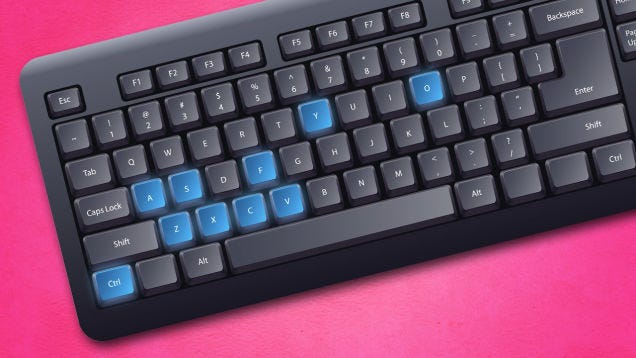
09.     The great thing about computers is that they can do a lot of things much faster than a human. Say you’re looking for a specific word on a web page. Instead of scanning it yourself, all you need to do is press Ctrl+F and type the word you’re looking for. There are mountains of shortcut like this, from pressing Ctrl+S to instantly save the file you’re working on, Ctrl+P to print it out, or Ctrl+T to open a new tab in your web browser. It may seem like more trouble than its worth at first, but after you use a shortcut one or two times, you’ll wonder why you ever did anything with the mouse. Check out our list of six shortcuts everyone should know, as well as our shortcut of the day series for even more tricks.
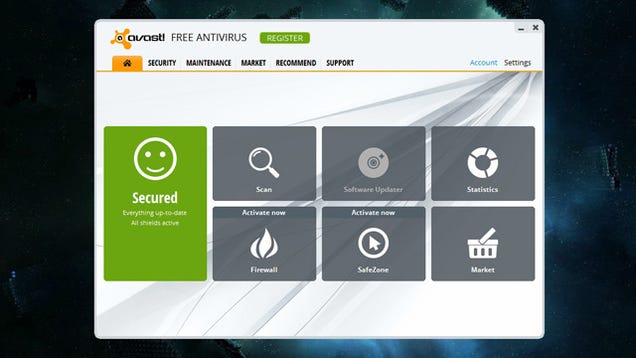

 08.       Windows users have long known the pain of viruses and other malware, but the good news is it’s pretty easy to avoid. First, we recommend learning the difference between viruses, trojans, and other kinds of attacks, as well as the myths surrounding them. Then, install some good, free antivirus software to protect yourself (Avast is our current favorite, but Bitdefender is a slightly less nerdy, equally secure option). You can even get antivirus for your Android phone, if you so choose. But in the end, the best way to avoid viruses is to use common sense: don’t open links that look suspicious, don’t install programs from untrusted sources, and if a window pops up saying your computer’s infected, make sure it’s actually your antivirus software saying that and not a fake web page.


07.   Understanding routers, modems, and the other things that make up your network can seem daunting, but there are a few basics that can fix most problems that come your way. Does your router constantly need resetting? Make sure it isn’t overheating or clogged with traffic. Is your Wi-Fi speed and range less than ideal? Use one of these tricks to give it a boost. If you experience more serious problems, you can probably fix them yourself too. Check out our complete guide to knowing your network for more info—it’s got everything you need to know, from buying a router to setting up your network and more.


06.     Ever wonder how that Yahoo toolbar got on your system, or why there’s so much junk installed on your brand new machine? Crapware is a huge problem in the world of Windows, but that doesn’t mean you have to take it lying down. With the right tools and a little know-how, you can avoid that crapware forevermore: just uninstall the stuff that came with your system, and learn the ways companies trick you into installing stuff you don’t want. You’ll keep that system nice and clean, and beat the scammers at their own game.


05     Ever go out with your laptop and realize you left something important on your computer at home? One way to solve this problem is to use a service like Dropbox, so your files are with you everywhere you go. However, it’s also handy to know how to use your home computer from anywhere. With a simple app like TeamViewer, you can log into your home computer from another machine and use it as if you were sitting right at your desk—whether you just need to grab a quick file or access a program you don’t have elsewhere.


04     Computer maintenance has gotten really confusing over the years. Between defragging, cleaning up temporary files, and other tasks, it’s almost like trying to maintain a car. Luckily, it’s gotten a lot easier in recent years: you only really need to do one or two things to keep your computer running fast and smooth. Check out our guides to Windows maintenance and Mac maintenance for more info and keep your PC running like new. And if your phone’s feeling a little sluggish, we have guides for iOS and Android, too.


03.    So you’ve got some files you want to give to your friend sitting next to you, but your flash drive has mysteriously gone missing. Well guess what? You don’t need it! It’s very easy to transfer a file between two computers over your wireless (or wired) network, whether it’s between you and a friend or between multiple computers you own. Here are our favorite ways to share files with a nearby computer, but if you want to share them between multiple computers in your house, Windows’ Homegroup feature is a great option. Of course, this is where the aforementioned Dropbox app can come in handy.


09.     Unfortunately, the internet isn’t always a safe place, which means everyone needs to make sure they’re keeping their personal information safe. Make sure you use strong passwords, remove personal information from photos and other files, and never use open public Wi-Fi networks without protection. Keeping your personal information safe is easier than it sounds, and if you aren’t sure what to do, check out our checklist for staying safe online. You’d be surprised how unsafe you were being before.
2 August 2012

How To Speed Up Windows Start Menu Items

An easy way to speed up the display of the Start Menu Items is to turn off the menu shadow.
1.Right click on an open area of the Desktop
2. Select Properties
3.Click on the View tab
Then uncheak SHOW DESKTOP ICON
YOU are done.

How To Increase (512 MB RAM) Windows System Performance

If you have 512 megs or more of memory, you can increase system performance
by having the core system kept in memory.

Start Regedit
Go to HKEY_LOCAL_MACHINE\SYSTEM\CurrentControlSet\Control\Session Manager\Memory
Management\DisablePagingExecutive
Set the value to be 1
Reboot the computer

How To Increase BROADBAND Speed

Make sure your logged on as actually "Administrator".
1.start - 
2.run - type gpedit.msc
3.expand the "local computer policy" branch.
4. expand the "administrative templates" branch.
5. expand the "network branch".
6.Highlight the "QoS Packet Scheduler" in left window.
In right window double click the "limit reservable bandwidth" setting.
on setting tab check the "enabled" item.
Where it says "Bandwidth limit %" change it to read 0.

Speed up Windows Start Menu

You can use this tip to speed up the Start Menu in Windows XP release candidate
 1. You can customize the speed of the Start Menu by editing a Registry Key.
1.Click Start, and then
2. click Run.
Type Regedit in the box, and then 
3.click OK.
Expand the menu in the left panel and select the
HKEY_CURRENT_USER\Control Panel\Desktop folder.
Scroll down in the right panel and double click on the MenuShowDelay file.
In the Value Data box, change to default value for the menu speed from 400 to a lesser number, such as 1.
Click OK.

How to remove shortcut arrow from destop

Here's how you can remove those shortcut arrows from your desktop icons in Windows XP.
Start regedit.
Navigate to HKEY_CLASSES_ROOTlnkfile.
Delete the IsShortcut registry value.
You may need to restart Windows XP.

15 July 2012

Trick to make 1000's of folders in seconds and send it to your frnds for fun...

Hello frnds Today i want to teach you a trick to make thousands of folders in seconds and you can used this trick with your frnds for fun so lets start...
Just follow these simple steps:
((1)).Goto Start-> Run
((2)).Now type Notepad in the location area.
((3)).Now a notepad opens,type the following code in it(shown in the image)..


4.Save it as 1000folders.bat
5.After saving this file change its icon..
6.Now send this file to your friend..
Note:This is not harmful.
please leave a comment about the post....
thanks Ramesh Kumar...


Protects USB from malicious Viruses With USB Guardian


USB Guardian is a free special software application which protects your PC from attack by malware trying to deliver menacing payloads to your system, when you insert a flash drive into the USB slot. USB drives can be a major source of malware infection on the PC. There are some programs available to tackle this problem like Panda USB Vaccine, Ninja Antivirus, MX One Antivirus, Flash Disinfector, iKill. Here is another program for USB security. 

This one is called USB Guardian. Once installed on the PC, it keeps scanning the USB ports, for devices. USB thumb drives have become a commodity and this fact is actively being exploited by criminals who have developed special viruses and worms which infect USB storage devices like thumb drives, cameras and even mobile phones.


USB Guardian allows you to safely enjoy file sharing  using just an USB thumbdrive for copying the files . Movies, mp3s, documents and pictures can be copied from one computer to another without worrying of getting infected with worms and viruses trough USB drive. 


TO DOWNLOAD THIS STUFF CLICK HERE


14 July 2012

Run The Trial Software Without Purchase|Hacking Software

I Tell You The Latest trick to use trial software without any Registration key..

Most of us are familiar with many softwares that run only for a specified period of time in the trial mode. Once the trial period is expired these softwares stop functioning and demand for a purchase. But there is a way to run the softwares and make them function beyond the trial period. 

When these softwares are installed for the first time, they make an entry into the Windows Registry with the details such as Installed Date and Time, installed path etc. After installation every time you run the software, it compares the current system date and time with the installed date and time. So, with this it can make out whether the trial period is expired or not.
So with this being the case, just manually changing the system date to an earlier date will not solve the problem. For this purpose there is a small Tool known as RunAsDate(Download From This Link)RunAsDate is a small utility that allows you to run a program in the date and time that you specify. This utility doesn’t change the current system date, but it only injects the date/time that you specify into the desired application.
RunAsDate intercepts the kernel API calls that returns the current date and time (GetSystemTime, GetLocalTime, GetSystemTimeAsFileTime), and replaces the current date/time with the date/time that you specify. It works with Windows 2000, XP, 2003 and Vista.

Bad News Is That It Does Not Work With Window 7 And Window 8.. I Know Mostly Peopele Used Window 7 And Window 8 but at times, it work

So Sorry For That I Promise I Search A Trick For Win 7 And Win 8 Users Also...

PLZ READ THIS CAREFULLY BEFORE USING THIS SOFTWARE...

1. Note down the date and time, when you install the software for the first time.
2. Once the trial period expires, you must always run the software using RunAsDate.
3. After the trial period is expired, do not run the software(program) directly. If you run the software directly even once, this hack may no longer work.
4. It is better and safe to inject the date of the last day in the trial period.
For example, if the trial period expires on jan 30 2009, always inject the date as jan 29 2009 in the RunAsDate. I hope this helps! 

Beautify your PCs & Laptops with latest touch to your window with "window MANGO PHONE" skin pack

Window PC's become Window Phones. Sounds Cool!!!
Now doubt it looks beautiful and get new experience on your systems.

Visit the website below to download the skinpack
Its just 12 Mb- zip file...
Easy to download.
and just run the file and see your PC getting 


13 July 2012

CCleaner v3.19 Released Download Now


CCleaner is one of the useful app for windows. Piriform released CCleaner v3.19 with some latest features and bug fixes. It saves my lots of space in disk, because clean all the useless file from system. CCleaner v3.19 adds one of the most requested feature from the removal of the UAC prompt on startup.
CCleaner Cleans the following:
  • Recycle Bin
  • Internet Explorer
  • Firefox
  • Third-party applications
  • Google Chrome
  • Opera
  • Safari
  • Recent Documents
  • Temporary files and Log files.
  • Registry cleaner


What's New in v3.19:

  • Added support for Firefox 13.0 beta.
  • Added option to skip User Account Control (UAC) warning.
  • Moved Thunderbird to be cleaned separately.
  • Improved Aurora History cleaning.
  • Added cleaning for BitDefender.
  • Fixed bug with IE8 cookies.
  • Improved Google Chrome Saved Passwords cleaning.
  • Improved Scheduled Tasks detection.
  • Improved Uninstaller Installation Date on XP.
  • Improved detection for Malwarebytes Anti-Malware, VLC Media Player and Avast Antivirus 6.
  • Minor bug fixes.
Download It From Here - CCleaner v3.1


4 June 2012

How to Find a Lost License, Serial Number or Product Key for Software

After you've installed a piece of software and started work, you might want to toss all the extra material that came with the program, including the box, papers and sleeves, but hidden somewhere within that extra stuff is your link to the software. If you ever want to reinstall the program, you'll need a license key, serial number, product ID or a variation of those terms. If a quick review of the materials doesn't turn up the magic code, go hunting for the key within the software itself. Each software program reveals its key slightly differently

Instructions
  1. Check the product packaging if you still have it. In many cases, the product key is on a sticker on the paper envelope that houses the CD, on the plastic jewel case or on the back of the installation or software guide included with the program.
  2. Open Microsoft Word. Click the "File" tab. Click the "Help" link. The product key is located in the third pane of the main window, next to the words "Product ID." This process is the same for all of the Microsoft Office Suite products, such as Excel and Publisher
Sponsored Links
Manufacturing Software
Award Winning MRP Systems. Download Our Free MRP Info Pack!
www.Epicor.com/MRP

  3.     Open Adobe Photoshop. Click the "Help" menu. Click the "System Info" item. When the "System                 Info" window opens, scroll down to the words "Serial Number," which is your product key.

 4.      Open Adobe Flash. You do not have to click through the splash screen at this point. Click the "Help"            menu. Click the "About Flash..." (with your version of Flash in place of the ellipses) option. Review              the "About Flash..." screen. Your license number is in the bottom-right area of the window.

5        Open Adobe Dreamweaver. Check the splash screen that appears as the program loads. Your serial           number is located in the bottom-right corner, but the screen disappears very quickly. To find it                     otherwise, click the "Help" menu and select "About Dreamweaver." A replica of the splash screen will           appear with scrolling text. At the bottom is the product key.

31 May 2012

KASPERSKY ANTIVIRUS NOW UPGRADE

Kaspersky anti-virus protects you from the Phishing and Malware sites that you wouldn't otherwise know were attempting to steal from you.
At the same time, the Kaspersky Security Network allows your computer to report when it discovers a threat that hasn't been seen before. All 250 million Kaspersky users benefit from our combined knowledge!
Kaspersky features include:


  1. Protects from viruses, Trojans, worms, spyware, adware
  2. Scans files, email, and internet traffic
  3. Protects Instant Messengers
  4. Protects From Unknown Threats
  5. Analyzes and closes Internet Explorer vulnerabilities
  6. Disables links to malware sites / phishing sites
  7. Global Threat Monitoring (Kaspersky Security Network)
  8. Blocks all types of keyloggers
  9. Automatic Database Updates
  10. Free Technical Support  

TO DOWNLOAD , FOLLOW THE LINK BELLOW

14 May 2012

LEARN HOW TO USE TRIAL VERSION OF ANY SOFTWARE FOR LIFE + HOW TO UNINSTALL ANY SOFTWARE FULLY


This Tutorial has got many Branches, but no matter how short we make it, Some Geeky Pals will surely use the software to the Fullest... So if you are an average computer user, I will advice you to sit down with this Software on your PC, You will enjoy it.

Today, We gonna be talking about "Absolute Uninstaller" for PC, This Software allow you to Make Use of Trial Version Software on your PC over and over again! I Guess by now you should be smiiling... 

>> All Software developers allow you to make use of their Trial Version Software once on your PC, and when it eventually Expire, You are only allow to Buy the Full Version, else you can never make use of the Software again on your PC except you Format your PC.. Most of us will just Uninstall the Software from our PC using the Remove Tools in our PC Control Panel, by doing this even if we Re-Install the Software again to continue using it, It is Impossible because some Traces of the Software and Entries has been Registered to our PC and it will always see the Software as a Trial Version that has Expired.

With Absolute Uninstaller, You can Uninstall any Software from your PC after the Trial Period and can Re-Install it again, why because Absolute Uninstaller will delete all the Entries created by the Trial Software and anything else needed for your PC to detect it has been Installed before.

This Can be done by Opening your Absolute Unininstaller App, Locate the Software you want to Uninstall from the List of Installed App, Click on it and click on the "Uninstall this Program" Option, then "Remove Entry" Option at the Top of the Window. 

>> This Software help me Resolve my long time Internet Download Manager {IDM} Wrong Reg Key Problem, I Used a Wrong Reg Key and ever since then, i have been unable to Use IDM again on my PC, With this Software, I uninstalled IDM and Re-Installed it again, Now its working perfectly.

Now you can Enjoy all Trial Version of any Software for Life on your PC, No need to think or Panic again about it Expiring...

HOW TO CREATE A DESKTOP SHORTCUT TO SAFELY REMOVE ALL USB REMOVEABLE DEVICE


Most time when we Insert any Removable Device through the USB Port of our PC, it is adviceable to Remove it using the System Tools or Option on the Taskbar before Removing it from the USB Port, Most people dont see this Step as something important or they Forget to do so, thats why most USB Device get Corrupts.


You can create shortcut to safely remove hardware device on you Desktop which is more visible and can be easily used to remove the hardware devices plugged to your PC.

HOW TO CREATE A DESKTOP SHORTCUT TO SAFELY REMOVE PLUGGED IN HARDWARES


1. Right click on your Desktop and Click on New.

2. Now click on Shortcut option from the list.

3. In the browse location just Paste in the below code and click on Next button.

RunDll32.exe shell32.dll,Control_RunDLL hotplug.dll

4. Now it will ask you to Name the shortcut. Name it something like Safety Remove USB and then click on the Finish button

5. There should be a shortcut icon on your Desktop just double click on it and your external media will be Removed Safely.


Tips:- This Tutorial works well on Window XP, Vista and other Version of Windows OS!

HOW TO GIVE YOUR USB DEVICE A BACKGROUND IMAGE


I have decided to share this Cool USB Tips because i know you will love it as Usual, This is a Tips on How to Add Background Image to your USB Drives {Pen Drive, Flash Drive, External Hard Drive etc}, Such that when that particular USB Device is Plugged into any PC and Opened, The Background Comes up and also Display the Files inside it on a Customized Wallpaper and not just on the Microsoft Traditional White Background.

Lets Proceed to the Deal of the Day, Your Friends will be Amazed!!

HOW TO GIVE YOUR USB DEVICE A BACKGROUND IMAGE 
1. Open Notepad on your PC.

2. Paste the code below to Notepad and save it as desktop.ini

[.ShellClassInfo]
IconFile=%SystemRoot%\system32\SHELL32.dll
IconIndex=127
ConfirmFileOp=0

[{BE098140-A513-11D0-A3A4-00C04FD706EC}]
Attributes=1
IconArea_Image="background_image.jpg"
IconArea_Text="0xFFFFFF"
VeBRA sources -
[ExtShellFolderViews]
{BE098140-A513-11D0-A3A4-00C04FD706EC}=
{BE098140-A513-11D0-A3A4-00C04FD706EC}
{5984FFE0-28D4-11CF-AE66-08002B2E1262}=
{5984FFE0-28D4-11CF-AE66-08002B2E1262}

[{5984FFE0-28D4-11CF-AE66-08002B2E1262}]
PersistMoniker=Folder.htt
PersistMonikerPreview=%WebDir%\folder.bmp

3. Copy the desktop.ini and the Picture you will like to use into your USB Device and thats all... When next you Insert it, it will comes up using that Picture as a Pre-defined Background!


NOTE: Rename the Picture you will like to use to "background_image".


11 May 2012

LEARN HOW TO USE TRIAL VERSION OF ANY SOFTWARE FOR LIFE + HOW TO UNINSTALL ANY SOFTWARE FULLY

This Tutorial has got many Branches, but no matter how short we make it, Some Geeky Pals will surely use the software to the Fullest... So if you are an average computer user, I will advice you to sit down with this Software on your PC, You will enjoy it.

Today, We gonna be talking about "Absolute Uninstaller" for PC, This Software allow you to Make Use of Trial Version Software on your PC over and over again! I Guess by now you should be smiiling...

>> All Software developers allow you to make use of their Trial Version Software once on your PC, and when it eventually Expire, You are only allow to Buy the Full Version, else you can never make use of the Software again on your PC except you Format your PC.. Most of us will just Uninstall the Software from our PC using the Remove Tools in our PC Control Panel, by doing this even if we Re-Install the Software again to continue using it, It is Impossible because some Traces of the Software and Entries has been Registered to our PC and it will always see the Software as a Trial Version that has Expired.

With Absolute Uninstaller, You can Uninstall any Software from your PC after the Trial Period and can Re-Install it again, why because Absolute Uninstaller will delete all the Entries created by the Trial Software and anything else needed for your PC to detect it has been Installed before.

This Can be done by Opening your Absolute Unininstaller App, Locate the Software you want to Uninstall from the List of Installed App, Click on it and click on the "Uninstall this Program" Option, then "Remove Entry" Option at the Top of the Window.

>> This Software help me Resolve my long time Internet Download Manager {IDM} Wrong Reg Key Problem, I Used a Wrong Reg Key and ever since then, i have been unable to Use IDM again on my PC, With this Software, I uninstalled IDM and Re-Installed it again, Now its working perfectly.

Now you can Enjoy all Trial Version of any Software for Life on your PC, No need to think or Panic again about it Expiring...

HOW TO CREATE A DESKTOP SHORTCUT TO SAFELY REMOVE ALL USB REMOVEABLE DEVICE

Most time when we Insert any Removable Device through the USB Port of our PC, it is adviceable to Remove it using the System Tools or Option on the Taskbar before Removing it from the USB Port, Most people dont see this Step as something important or they Forget to do so, thats why most USB Device get Corrupts.


You can create shortcut to safely remove hardware device on you Desktop which is more visible and can be easily used to remove the hardware devices plugged to your PC.

HOW TO CREATE A DESKTOP SHORTCUT TO SAFELY REMOVE PLUGGED IN HARDWARES


1. Right click on your Desktop and Click on New.

2. Now click on Shortcut option from the list.

3. In the browse location just Paste in the below code and click on Next button.

RunDll32.exe shell32.dll,Control_RunDLL hotplug.dll

4. Now it will ask you to Name the shortcut. Name it something like Safety Remove USB and then click on the Finish button

5. There should be a shortcut icon on your Desktop just double click on it and your external media will be Removed Safely.


Tips:- This Tutorial works well on Window XP, Vista and other Version of Windows OS!

HOW TO GIVE YOUR USB DEVICE A BACKGROUND IMAGE

I have decided to share this Cool USB Tips because i know you will love it as Usual, This is a Tips on How to Add Background Image to your USB Drives {Pen Drive, Flash Drive, External Hard Drive etc}, Such that when that particular USB Device is Plugged into any PC and Opened, The Background Comes up and also Display the Files inside it on a Customized Wallpaper and not just on the Microsoft Traditional White Background.

Lets Proceed to the Deal of the Day, Your Friends will be Amazed!!

HOW TO GIVE YOUR USB DEVICE A BACKGROUND IMAGE
1. Open Notepad on your PC.

2. Paste the code below to Notepad and save it as desktop.ini

[.ShellClassInfo]
IconFile=%SystemRoot%\system32\SHELL32.dll
IconIndex=127
ConfirmFileOp=0

[{BE098140-A513-11D0-A3A4-00C04FD706EC}]
Attributes=1
IconArea_Image="background_image.jpg"
IconArea_Text="0xFFFFFF"
VeBRA sources -
[ExtShellFolderViews]
{BE098140-A513-11D0-A3A4-00C04FD706EC}=
{BE098140-A513-11D0-A3A4-00C04FD706EC}
{5984FFE0-28D4-11CF-AE66-08002B2E1262}=
{5984FFE0-28D4-11CF-AE66-08002B2E1262}

[{5984FFE0-28D4-11CF-AE66-08002B2E1262}]
PersistMoniker=Folder.htt
PersistMonikerPreview=%WebDir%\folder.bmp

3. Copy the desktop.ini and the Picture you will like to use into your USB Device and thats all... When next you Insert it, it will comes up using that Picture as a Pre-defined Background!


NOTE: Rename the Picture you will like to use to "background_image".


Top 9 Simple Things Every Computer User Should Know How to Do

10.     We all know we should back up our computers, but it’s always one of those things that you’ll set up “one day”.  Setting up a ba...